
In my very first tutorial, I'll be explaining how to create beautiful 3D grassy nails. This one is actually really simple, and I was surprised by how long lasting it was - the grass is properly stuck on, even after washing my hands! It's done with the grass that you can get from modelling and craft stores, (mine is from Games Workshop - shh).


Ingredients

Green nail varnish
Clear nail varnish / topcoat

Flocking grass from a craft or modelling shop. I got mine here.
Step 1: Green base coat
Start off by painting your nails green. I didn't have any green nail varnish when I randomly decided to do this manicure, so I used artists' acrylic paint. That's why its a bit shiny and odd looking; I don't recommend it! If you do decide to use acrylics, make sure you use a good base coat. I did, and the edges of my nails were still stained yellowy-green for a couple of days - oops.
Anyway, the good news is that it doesn't really matter for this manicure, as you'll hardly see the base coat once we're done.
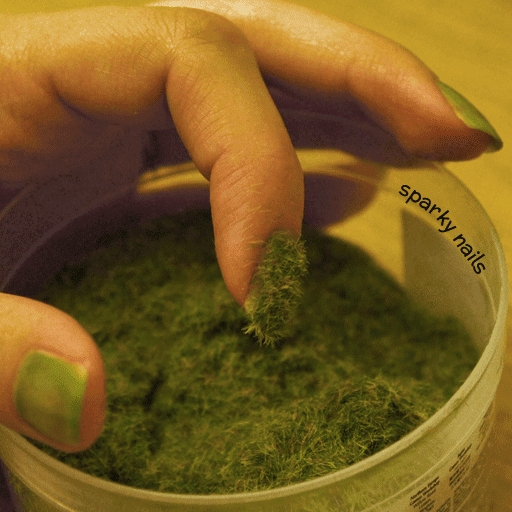
Step 2: Add the grass
Next, open up your tub of grass. Don't sneeze.
One nail at a time, paint them with a good thick coat of clear polish and then immediately place them in the grass. Scoop up the grass and place it on the nail so that you get a really thick coating.
Geeky tip - the grass is actually called static grass because the electrical charge makes the grass stand on end to make a really cool 3D effect. To emphasise this, turn your nail upside down and tap on the finger to shake the excess grass off and make it really stand up.
The final result
And we're done. I said it was easy!
I was really pleased with how this looked in the end and how the grass stayed upright instead of matted on my nail.
No comments:
Post a Comment